


Sometimes you just have to create something pretty—for the sole reason of the beauty and joy of creating and the joy of the beauty of the finished project. No purpose for the finished item but to be looked at and enjoyed.
It’s been good to get back into my studio. This past year has been hard, and little creativity, or time or brain space for it, was happening. My happy place is being restored, and I’m happy for that. This project was a boost back that direction.
I’ve been wanting to make a tab hinged book for quite a while—several months. Last month I finally did it, after starting completely over because I wasn’t liking the way the tag pages were turning out. My fixes weren’t helping me like it any better, so I restarted from scratch.
Read on if you want the process instructions and list of supplies used. If not, just look at the pretty pictures.
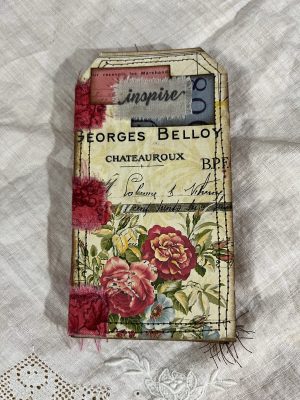
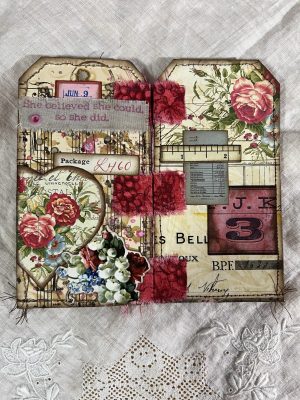
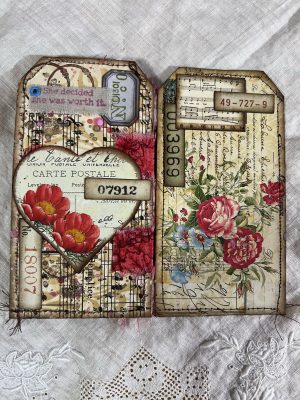
I still used antique music pages for the tag pages, as was my original plan, but I paired them with a printable I loved. (Sorry I don’t remember the source, it’s been in my stash a long time.)
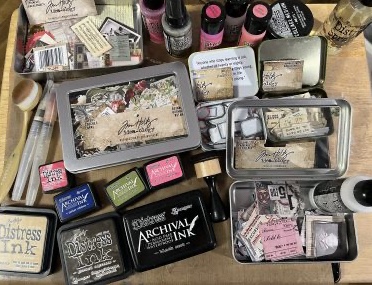
The music side of the tags was splattered with various Distress inks, oxides, sprays, and paints. Then I stenciled and stamped on each music tag. Next I inked the edges of all tags, both music paper and printables.
I sandwiched (glued) a light chipboard food box between those two layers, music paper on one side, pretty floral on the other, for extra sturdy pages—which made it a bit tricky for sewing around the edges. But my machine did it, even though a bit wonky. Next step was to hinge the pages together.
Instructions to make the Tab Hinged Book:
Tear/ cut strips of a coordinating fabric—approximately 3/4” wide and 1 1/2” long. Lay down the first page (front cover) face up. Glue three tabs half on/half hanging off, on the left side, spaced evenly with a space between them wide enough to add another tab.
Turn that first page over (back side up) and lay second page next to it (on the right side of it), front side up. Glue 2 tabs (half on/half off) onto the second page left front, spaced to fit between the tabs on the first page.
Turn the second page over on top of the first page, just like turning the pages of a book. Wrap the 3 tabs from the first page around to the back of the second page, and glue to secure. Make sure your 2 second page tabs are sticking out to the right.
Repeat with your third page, laying it face up to the right of your second page. Gluing 3 tabs (half on/half off) to the left front of your third page, spacing them between the 2 tabs of your second page. Turn the third page over on top of your second page, and wrap around and glue the 2 tabs from the second page to the back of your third page. (Making sure that its 3 tabs are sticking out to the right.)
Repeat this process with as many pages as you want. But do not add any tabs to the front of your last page. The tabs added to the front of your second to the last page will wrap around to the back of your last page. If you have an even number of pages, you will end up with 3 tabs on the back, as well as the front. — If you have larger pages, make your tabs wider. If you have much larger pages you can increase the number of tabs.
Now on to decorate the pages. You could leave blank or minimally decorated pages, if you want to journal/write on them or add pictures, or pockets to add other ephemera.
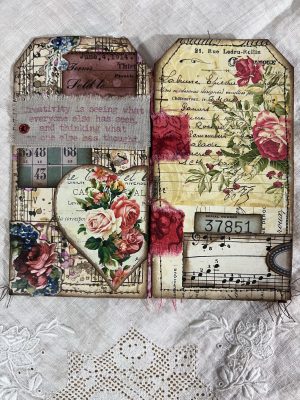
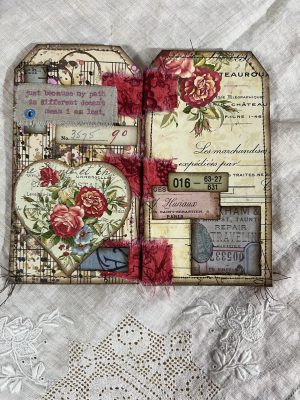
I wanted to add inspiring quotes and fully decorate. Most of my quotes came from Tim Holtz stamps, which I stamped with Distress Archival Ink onto cotton fabric strips. I added an eyelet to each, just for aesthetics.
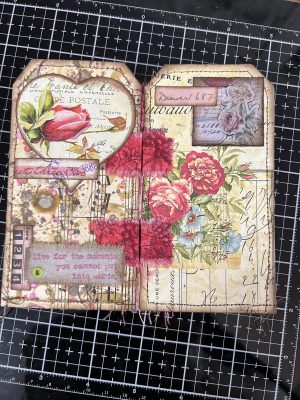
The printable had hearts to coordinate, that I cut out with my Scan n Cut ( yeah, I hate fussy cutting), and I adhered one to each of the music sides of the tags. I also added a pocket I cut from the printable scraps to the back page.
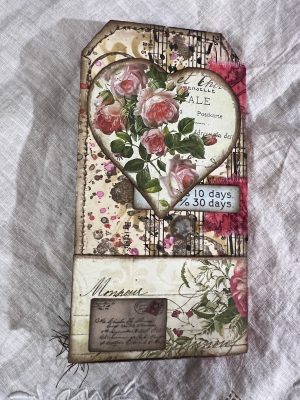
The rest of the decorative pieces are from various Tim Holtz Idealogy sets and Tim Holtz stamps, and the music paper. I inked the edges, and on some of them I also distressed with a distress tool—(the edge of scissors can be used.) I glued or stapled each on, with Distress Collage Medium or Tiny Attacher.
The purpose of this Journal/book is purely aesthetic. The joy in creating it. The joy of looking at and flipping through it. The joy and encouragement in reading the quotes. Just to add beauty and creativity to Life! I’m back in my Happy Place.
Supplies I used:

Living Coram Deo & freely whole
SDG!
~ Liberty
Subscribe to my email list in the sidebar and get notifications of future posts on this website.
Join me on Facebook, Like & Follow my Freely Whole public page.
To share Soul Care Creativity, join my Freely Whole Creative Community on Facebook.
and Follow @FreelyWhole on Instagram and hashtag your creations #freelywholecreative
Please consider supporting Freely Whole ministries. Your support helps me to continue to provide Soul Healing content, to empower you and others to live a life that is Freely Whole—in Jesus!
💝
Living Coram Deo & freely whole
SDG!
~ Liberty—Life Restoration & Soul Transforming Creativity Coach
Empowering you to live a life that is Freely Whole—spirit, soul, and body—in Jesus!
Connect with Freely Whole on Social Media
💝
Discover more from freely whole {living}
Subscribe to get the latest posts sent to your email.