


This easy to make, and fun to use mini Art Journal will make creating a breeze. Make this journal with just 3 simple paper supplies plus basic tools. Then you can get creative with any type of art work you please on the inner pages.
Supplies:
For this journal you need
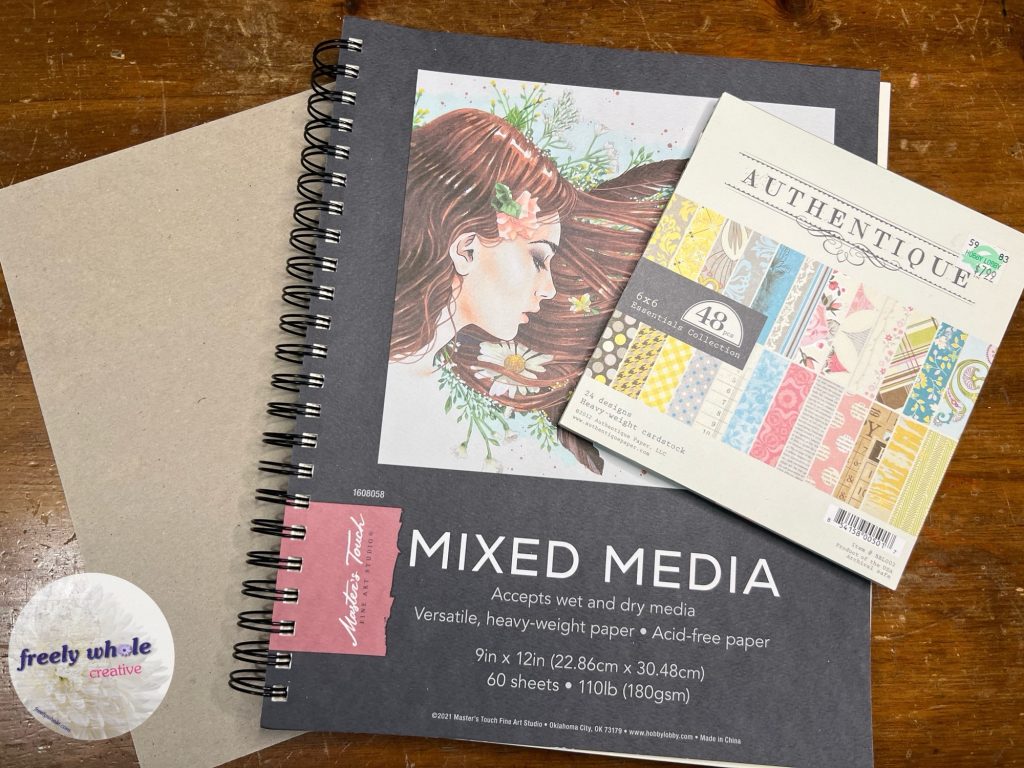
1) mixed media or water color paper—for inner pages, 2 sheets, 9×12”.
2) chip board—for book covers—At least medium weight. I recommend heavier than cereal/cracker boxes, something more like a HEAVY backing from a paper pad or at least 2 layers of food box. 1/2 page size is plenty.
3) patterned paper to cover the cover, plus optional embellishments. The patterned paper can be from a scrapbook type paper pad (6×6” will work—2-3 sheets, or one 12×12”). Or you could use digital printouts, book pages, atlas/map, sheet music, or paper you decorate yourself, such as gel printed, inked or painted background pages, etc. not too heavy weight.
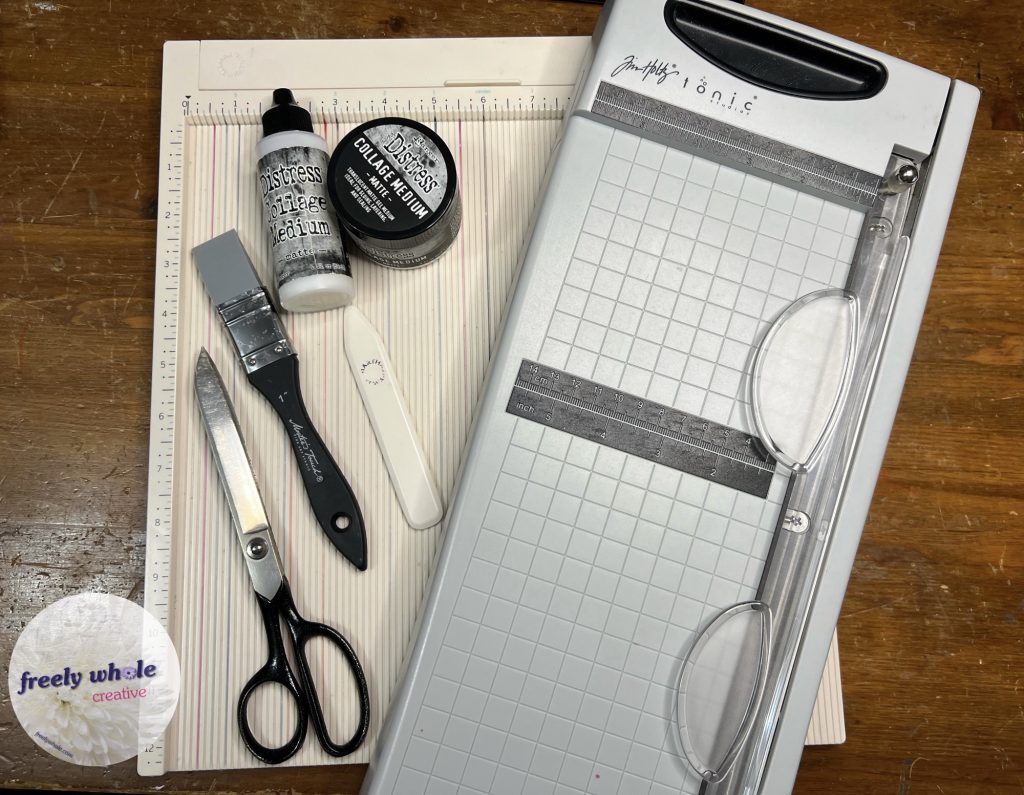
4) You’ll need tools to measure, cut, score and glue. I use my Tim Holtz Guillotine paper cutter (could use blade and straight edge), 12” scoreboard and bone folder, and Distress Collage Matte Medium, and a spreader.
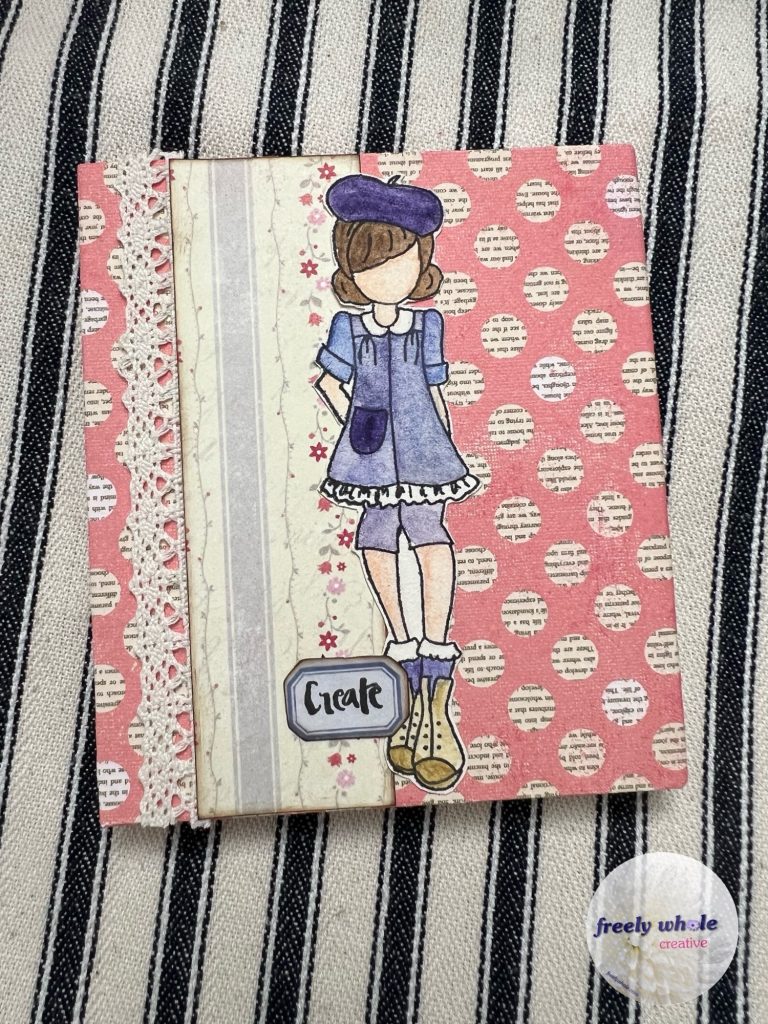
My embellishments, including an inside back pocket, are coordinating patterned paper, crocheted lace, a Tim Holtz label, stamps from Julie Nutting’s “Craft Day” set (girl and “Create”), Black Soot Archival Ink, Distress Watercolor Pencils. My patterned papers are from a double-sided 6×6” pad, from Authentique. I used different, coordinating papers for the front and back, and the reverse side for the pocket, and decorative strip.
Cut & Score:
Cut 2 chipboard pieces, each 4.75 x 4”.
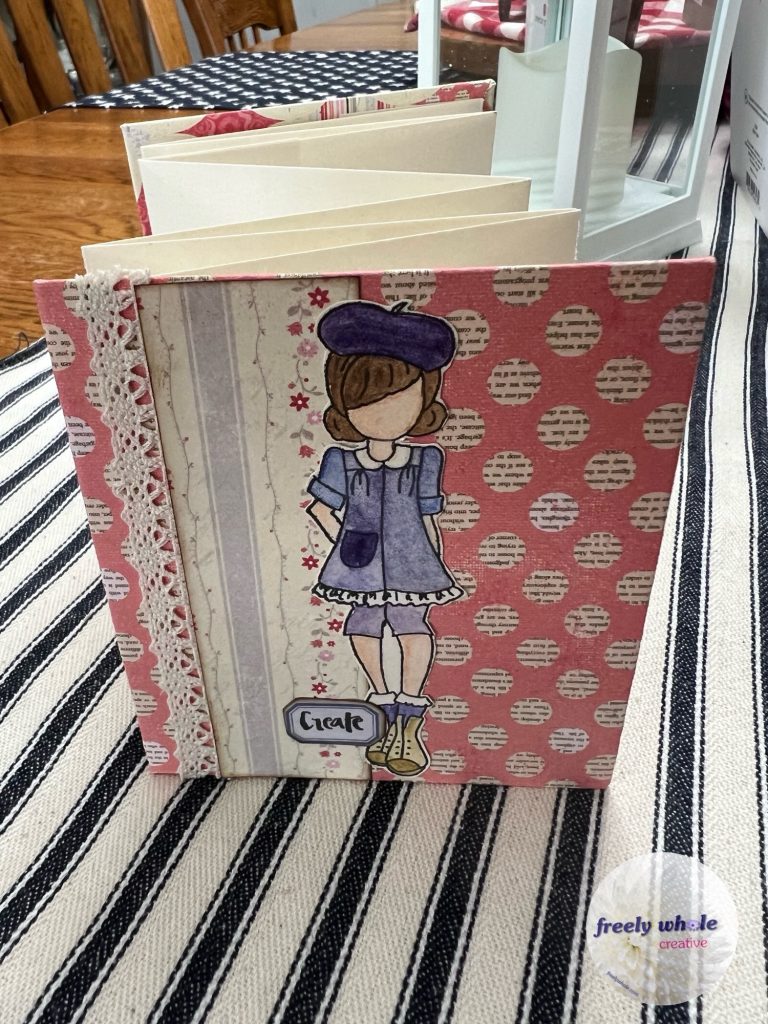
Cut both Mixed Media sheets (9×12) in half lengthwise, 4.5 x 12”. Score each at 3.75”, flip over vertically and score at 7.5” (on the reverse side), flip back to first side and score at 11.25”. Fold and burnish scores, alternating direction, to form accordion folds, making sure top and bottom edges are aligned.
Cut patterned paper, 2 pieces, each 5.75 x 5”. And optionally, 4.5 x 3.25” if you want a back inner pocket. If you want a decorative strip on the front, cut a piece 4.75 x 1.25” (or other width desired).
(My pictures here are of a slightly smaller album. 4.25 x 3.75”. I chose to change to the larger measurements for these instructions, to use the full mixed media sheets. Yet still keep it “Mini”. But you can make these any size! I also give gluing directions to put the page to the edge of cover, not centered as pictured, to avoid cover overlap.)
Glue:
Coat 1 side of each piece of chip board with adhesive and glue to center of each of the larger pieces of patterned paper. Using bone folder to help get a sharp, tight crease, fold each edge of patterned paper over the chip board edges. Miter corners. Glue each side to insides of cover.
Place first creased mixed media strip with the 3/4” section on the right, and left-most crease as a valley fold (crease forms a V, sides fold up.) Place second mixed media strip, with larger section on the left, over the 3/4” end (into the valley), oriented with left-most crease to fold under (mountain). Glue, butting edge into fold, without going over the fold line.
Turn piece over. Repeat with third strip, gluing it into the fold of 3/4” section of second strip. Turn over and repeat. Before adding 4th strip, cut off its 3/4” section. Then repeat, gluing fourth section into fold of 3/4” section of third section.
Accordion fold your book pages, making sure left edges/creases all align. Adjust folds if needed. Glue left page onto inside of front cover, with right folded edge even with the right edge of inside of cover, and vertically centered. Glue right-most page to inside of back cover, with left most edge along the inside right of cover. And making sure tops and bottoms of both covers line up.
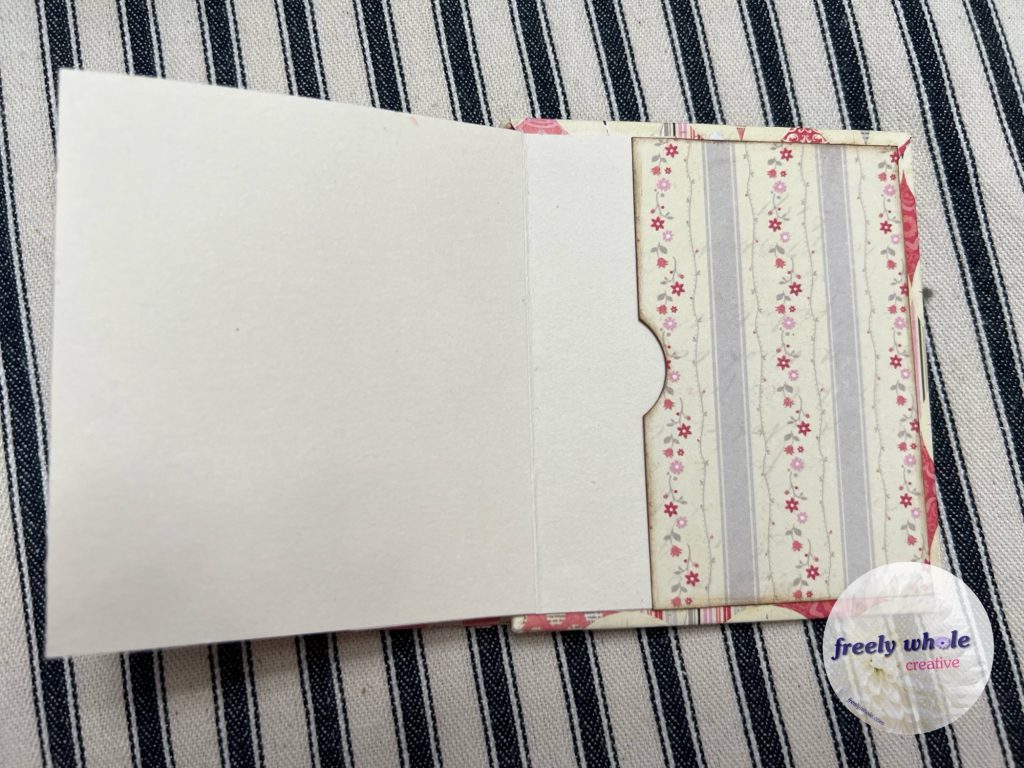
Optional Pocket:
If you want to add a pocket to the inside (or outside) of back cover, punch a small thumb notch with a 1” (or other size) circle punch, in the middle of the left side, then glue the other 3 edges of the pocket, near the right side of inner back cover, and centered top to bottom.
Decorate front cover as desired.
Enjoy creating little art/mixed media spreads on your pages!

Video Tutorial for this project in the next post!
💝
Living Coram Deo & freely whole
SDG!
~ Liberty—Life Restoration & Soul Transforming Creativity Coach
Empowering you to live a life that is Freely Whole—spirit, soul, and body—in Jesus!
Connect with Freely Whole on Social Media
💝
Discover more from freely whole {living}
Subscribe to get the latest posts sent to your email.