


You know I’m always up for making different types of tucks and pockets and such for my handcrafted Journals. It’s one of my happy places for keeping creative juices flowing, and great soul care. Always learning and trying something new. And always adding my own twist to what I’m inspired by others to try.

A couple of weeks ago, I watched a YouTube video for making a 6 Pocket Wrap-Around Envelope, as a Journal insert. The make used standard #6 office envelopes with a triangle flap. (That’s the shorter, check sized envelopes, not the long business #10 ones.) But, the only store we have for inexpensive, home office supplies anymore is Walmart, and they only carry the straight narrow flap ones. So I didn’t have any triangle flap ones.
What I do have though is my beloved Envelope Punch Board and plenty of patterned/scrapbook paper. Time to get innovative and see what I could do. I actually think it came out better in some ways, as 1) I didn’t have to cover/ collage over the envelope, saving time and reducing bulk, 2) I could glue the envelope together after folding, so it didn’t buckle and I could glue the inside piece in easier before gluing the side flaps.
To make this, you need literally 1 sheet of patterned paper. If you have double sided, that’s even better. But you want a thinner paper, not heavier cardstock. A double sided digi print would be great!
Tools needed: Envelope Punch Board, paper trimmer/or scissors and ruler, glue, optional ink and blending tool, optional any further embellishments you’d like.
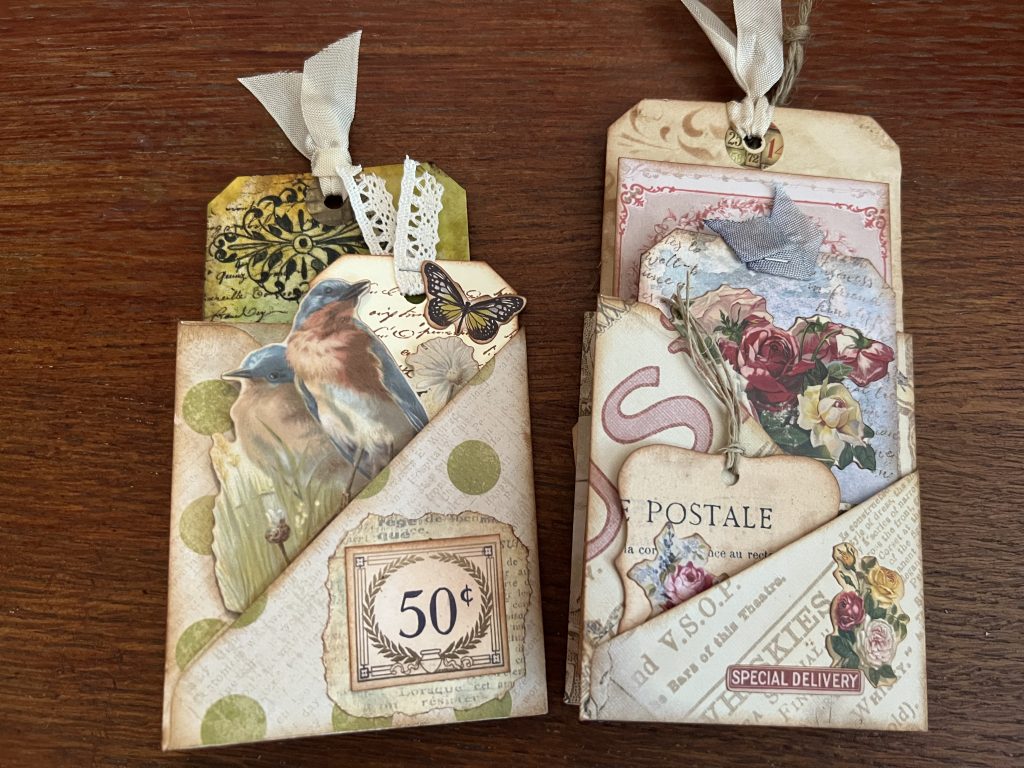
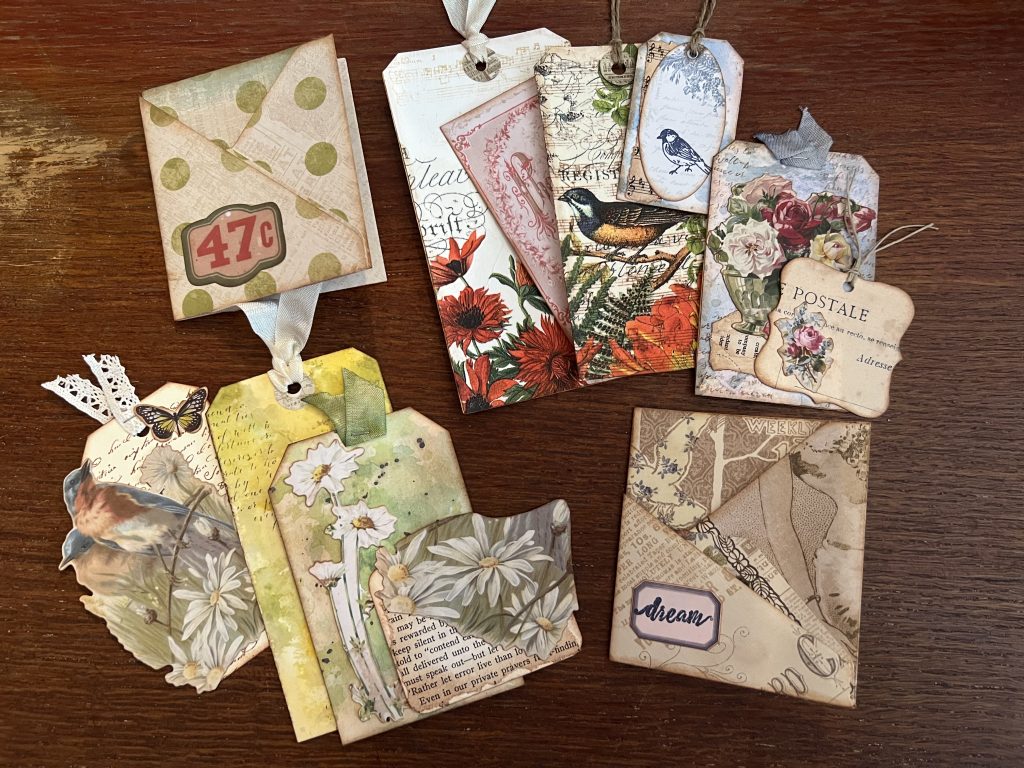
This envelope fold forms 6 pockets, so you’ll want tags and such to put in the pockets—decorated however you desire.
Grab your supplies and let’s create! Video Tutorial below.
- Cut 8.25” square from paper
- Punch and score on EPB for 3.5”x6.5” envelope (first punch and score at 3 1/8”)
- Lightly crease score lines
- Cut top flap/ triangle off (along score line). Cut or fold in bottom flap triangle to meet edges of side flaps.
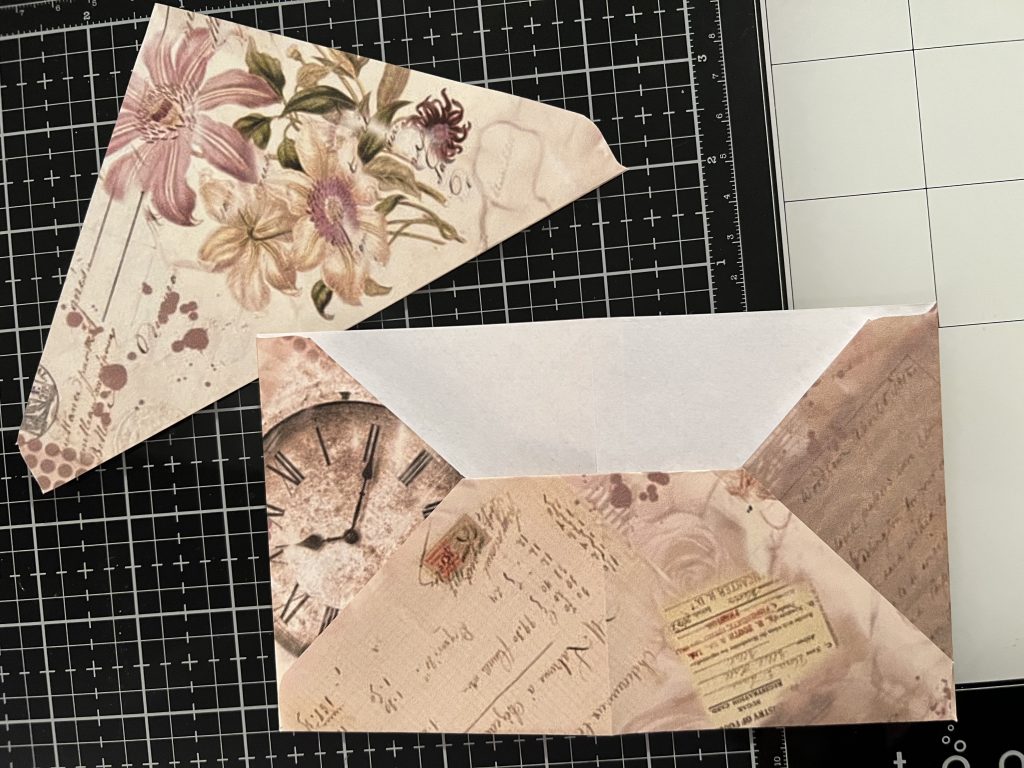
- Fold both envelope and removed flap in half lengthwise. Crease and smooth so there is no buckling.
- Choose whether to leave flap (which will form the front pockets) full height or to cut it down (fold in half, and angle cut to make a new point.) See pics for both examples.

- If your paper is not double sided, cut a strip just under the width of the envelope and tall enough to cover what will be seen of the inside. Glue on to inside.
- Ink the edges and folds, if desired.
- Fold side flaps in, bottom flap up, and in half. Smooth, and burnish the creases. Glue the bottom flap to the side flaps, making the actual envelope. (When folded in half, first 2 pockets.)
- Glue the long edge of the cut off flap to the bottom edge of the envelope (and up the little short outside edges). (When folded in half, next 2 pockets.)
- You’re done with the construction!
- Decorate as desired.
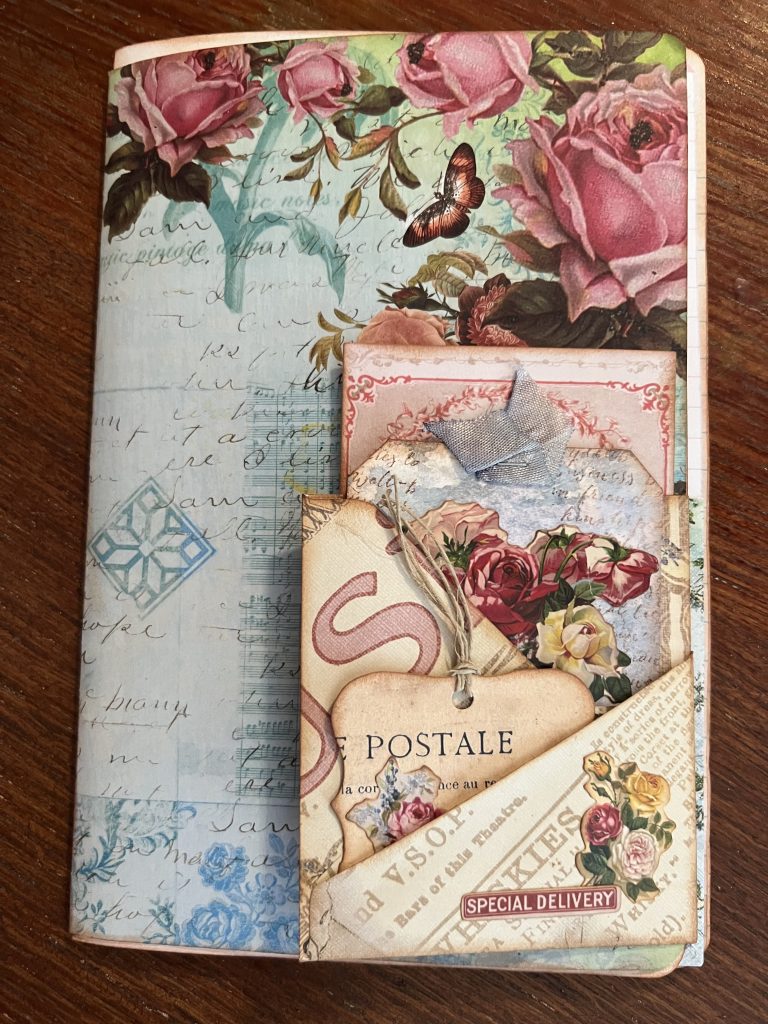
- Wrap envelope around the edge of a journal page.
- Glue bottom edges (and the open sides, if desired) to the journal page—forming your last 2 pockets, between the envelope and the page, on both sides.)
- Add tags to all 6 pockets.
Watch the Video Tutorial!
What do you think? Was that easy or what? Comment below!
I want see your 6 Pocket Wrap-Around Envelopes!
Subscribe and comment here. And, Join one of my Creative Communities and share your pics there–links below.

P.S. The rest of the story, the God-thing! : I made my first envelopes pictured here right after Melina posted her video and I watched it. Later that day, I had to go to the bank. My bank just changed its name, so evidently didn’t have new cash envelopes with the new bank name—so they gave me my cash in a regular #6 office envelope! Now I have one to try Melina’s way. 😊
Living Coram Deo & freely whole
SDG!
~ Liberty
Please consider supporting Freely Whole ministries. Your support helps me to continue to provide Soul Healing content, to empower you and others to live a life that is Freely Whole–in Jesus!
Subscribe to my email list in the sidebar and get notifications of future posts on this website.
Join me on Facebook, Like & Follow my Freely Whole public page.
To share Soul Care Creativity, join my Freely Whole Creative Community at MeWe or Facebook,
and Follow @FreelyWhole on Instagram and hashtag your creations #freelywholecreative
💝
Living Coram Deo & freely whole
SDG!
~ Liberty—Life Restoration & Soul Transforming Creativity Coach
Empowering you to live a life that is Freely Whole—spirit, soul, and body—in Jesus!
Connect with Freely Whole on Social Media
💝
Discover more from freely whole {living}
Subscribe to get the latest posts sent to your email.