


This project is no where close to what I thought my first project on this blog would be. It seems like a strange fit for here, at least to me, as a first project here, rather than it being on my old one. 2020 was to be the kick-off of actual projects here. I’m not even particularly into Gnomes! But I saw several cute ones, and decided I wanted to design and make some. Just for fun. For my kids’ families for Christmas.
So consider this project as a Pre-project, to whet your appetite. Next month I will be starting a series of 12 Months of Wholeness through Creativity. I’ll be presenting monthly Freedom & Simplicity™ projects that help you open up your creativity, reduce stress, and even heal from brain or trauma injury. Crafting may (or may not) be cheaper than therapy, but it is excellent therapy–whether that is just for general relaxation or brain healing.
Subscribe in the sidebar –> to get future posts!
In addition to the posts here, you can Click here to go to past crafty posts.
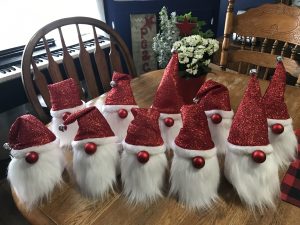
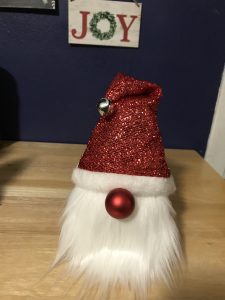
Now, for today, let’s make a Gnome!
- Supplies:
- Men’s sock (Dollar Tree 2 pair/$1 – makes 4)
- Fun Fur (Hobby Lobby $3.49 – 9″x12″ makes 6)
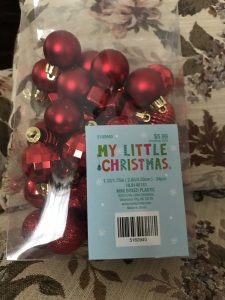
- Small round ornament or wood ball or ? (Ornaments: Hobby Lobby My Little Christmas 1.12″, Hobby Lobby 1″ wood ball. Several per pk.)
- 18″ tree skirt (Dollar Tree – makes 4) (or flat-cone shape fabric and trim.)
- Bell
- Rubber band or twine
- 1.5# dried corn, lentils, beans, rice etc.
- Tools:
- Glue Gun
- Scissors
- Heavy thread and needle (could probably use glue gun)
- Sewing machine (optional. could hand sew or use glue gun)
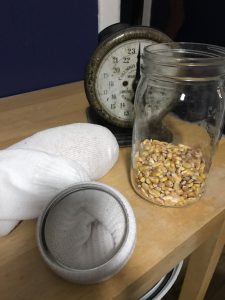
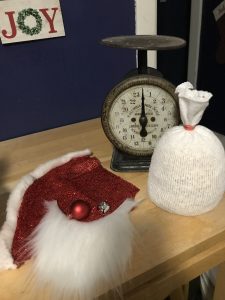
Pour 1.5# dried corn/lentils/beans/rice into sock. Shake down. It should fill to just under the heel. Put rubber band on, or tie tight with twine. Cut off sock about 1-2″ above band. Here’s how I did it, to make it easy to get the grain in. Put a canning jar ring in the sock, and pour the grain in. You could also just put the top of the sock over a wide mouth quart jar with the grain in it, and turn it over. It’ll take more than 1 jar for 1.5″.
Even easier! For a smaller gnome: Use a 1# bag of lentils or beans and stuff into the sock, package and all.
Cut beard(s) from Fun Fur (can get 6 from one 9×12″ piece, 2 across, 3 down). Trace shape onto backside of fur, cut through ONLY the backing, NOT the fur! An Exacto knife is usually best way. I comb the fur in the opposite direction with my fingernails, to avoid cutting into it.
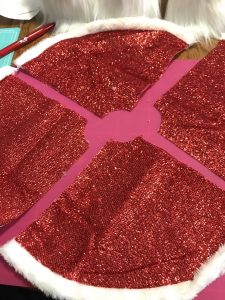
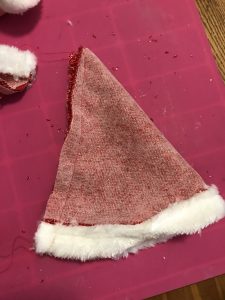
Cut Tree Skirt into 4 equal flat-cone/triangle pieces. Sew the 2 straight sides together (right sides facing,) or hot glue instead of sewing. Turn hat right side out. Sew (or hot glue) bell to top of hat.
I usually do a trial fit at this point, to line up beard and hat. You want the 2 to touch. Beard touching table. Hat not too high on the “head”.
Hot glue beard on, just around the top edge of it. Hot glue nose on, just above the beard. Scrunch filled sock up tight around nose, so it will stick on properly and indented, not fully sticking out. I removed the ornament caps and only used the matte red ones from this package.
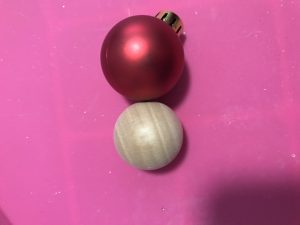
Here’s a comparison of the ornament balls I used and a 1″ wood ball. My sister was not able to get the same supplies I did, so she used even larger wood balls, and she painted them red. (I’ve also heard others use ping pong balls painted. That may be TOO large though, especially if you only use 1# of beans.–She also used really large bells on the hats.)
Pull hat on down, right up next to nose, and barely over the top of the beard on the sides. Tack down in 3-4 places with hot glue.
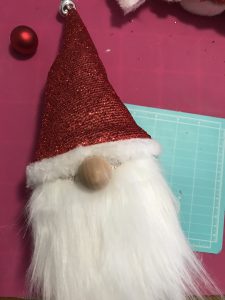
Each gnome will have its own characteristics. Some will be short and plump, others taller and slimmer. On some their hats will stand up, others will slouch over. Placement of beards and hats will make them appear longer or shorter. Let each one develop into its own “person”.
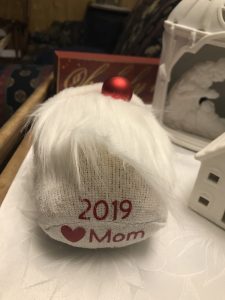
For a final touch, if you have a Cricut and HTV/iron-on vinyl, “sign” the bottom with the date and your name. A Cricut Mini EasyPress works perfect for applying vinyl to these irregular shapes. Squeeze the sock to get a nice “solid” surface to iron on to.
The beard (and hat for using regular fabric) patterns are available to Download free.
These instructions and patterns are FREE for you to use, just don’t copy, repost, or claim it as yours. Instead, share by providing a link to this post. Thanks.
💝
Living Coram Deo & freely whole
SDG!
~ Liberty—Life Restoration & Soul Transforming Creativity Coach
Empowering you to live a life that is Freely Whole—spirit, soul, and body—in Jesus!
Connect with Freely Whole on Social Media
💝
Discover more from freely whole {living}
Subscribe to get the latest posts sent to your email.